Caulking a bathtub may seem daunting, especially if you’ve never done it before. However, with a little patience and the right tools, you can achieve a professional-looking finish that will protect your bathroom from water damage and mold. Whether you’re a DIY novice or a seasoned home improvement enthusiast, this guide will walk you through the process step by step.
Table of Contents
Why Is Caulking Important?
Caulk serves as a sealant that prevents water from seeping into the cracks between your bathtub and the surrounding tiles or walls. Over time, old caulk can crack or peel away, allowing water to penetrate, which can lead to mold growth, water damage, and structural issues. Replacing old or damaged caulk is essential to maintain the integrity of your bathroom and ensure it remains a clean and healthy space.
Tools and Materials You’ll Need
Before you start, gather the following tools and materials:
- Caulk (silicone-based for bathrooms)
- Caulk gun
- Caulk remover tool or utility knife
- Painter’s tape
- Rubbing alcohol or bleach solution
- Paper towels or a clean rag
- Caulk finishing tool or your finger (for smoothing the caulk)
Step 1: Remove the Old Caulk
Start by removing the old caulk. This is a crucial step to ensure that the new caulk adheres properly and creates a strong seal. Use a caulk remover tool or a utility knife to carefully scrape away the old caulk. Be gentle to avoid damaging the bathtub or tiles. Once you’ve removed most of the old caulk, clean the area with rubbing alcohol or a bleach solution to kill any mold or mildew. Allow the area to dry completely before proceeding.
Step 2: Prepare the Area
To achieve a clean, professional-looking line of caulk, apply painter’s tape to both sides of the seam where the bathtub meets the wall or tiles. This will help you apply a straight and even line of caulk and prevent excess caulk from spreading onto the surrounding surfaces.
Step 3: Apply the New Caulk
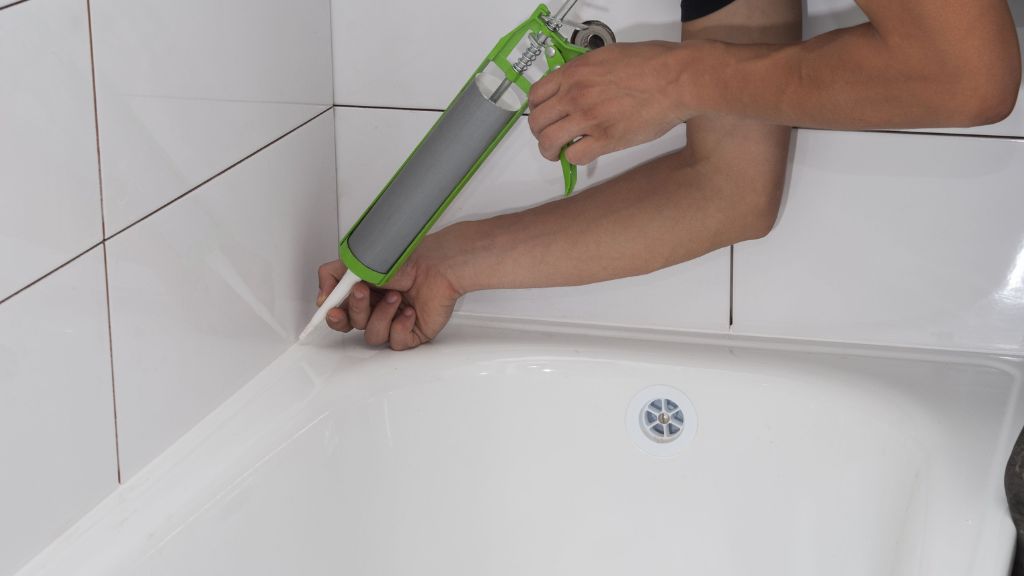
Load the caulk tube into your caulk gun. Cut the tip of the caulk tube at a 45-degree angle to control the flow of caulk. Begin applying the caulk by squeezing the trigger of the caulk gun and moving it along the seam in a steady, continuous motion. Aim to apply a bead of caulk that is wide enough to fill the gap but not too thick. It’s better to apply a little more than needed, as you can always remove excess caulk.
Step 4: Smooth the Caulk
Once you’ve applied the caulk, it’s time to smooth it out for a clean finish. You can use a caulk finishing tool or simply use your finger. If using your finger, wet it with water or a bit of soapy water to prevent the caulk from sticking. Run your finger or the tool along the seam to smooth the caulk and push it into the gap. Wipe away any excess caulk with a paper towel or rag.
Step 5: Remove the Tape
While the caulk is still wet, carefully remove the painter’s tape. This will leave you with a crisp, clean line of caulk. If you notice any imperfections, you can smooth them out with your finger or tool.
Step 6: Allow the Caulk to Cure
Caulk typically needs to cure for at least 24 hours before it gets wet. Check the manufacturer’s instructions on the caulk tube for specific curing times. During this period, avoid using the bathtub or shower to ensure the caulk sets properly and forms a strong seal.
Step 7: Regular Maintenance
To keep your bathtub caulk in good condition, clean it regularly and inspect it for any signs of wear or damage. If you notice any cracks or gaps, reapply caulk as needed to maintain a watertight seal.
FAQs About Caulking a Bathtub
Q: How often should I re-caulk my bathtub?
A: It’s a good idea to inspect your bathtub caulk at least once a year. If you notice cracks, peeling, or mold growth, it’s time to re-caulk. Typically, caulk lasts around 5-10 years, but this can vary depending on the quality of the caulk and the conditions in your bathroom.
Q: Can I caulk over old caulk?
A: While it’s technically possible to caulk over old caulk, it’s not recommended. The new caulk may not adhere properly, and the seal may be compromised. It’s best to remove the old caulk entirely before applying new caulk.
Q: What type of caulk should I use for my bathtub?
A: Use a silicone-based caulk designed for bathrooms. Silicone caulk is water-resistant, flexible, and durable, making it ideal for areas exposed to moisture.
Q: How can I prevent mold from growing on my caulk?
A: To prevent mold growth, ensure the caulked area is well-ventilated and dry after each use. You can also use a caulk that contains a mold inhibitor. Regular cleaning with a mild bleach solution can also help keep mold at bay.
Q: What should I do if I make a mistake while caulking?
A: If you make a mistake while applying caulk, don’t panic. You can quickly wipe away the wet caulk with a damp rag and reapply it. For small touch-ups, use your finger or a caulk finishing tool to smooth out any imperfections.
Conclusion
Caulking your bathtub is a straightforward DIY project that can save you money and protect your bathroom from water damage. By following these easy steps and using the right tools, you can achieve a professional-looking finish that will last for years. Whether you’re freshening up your bathroom or tackling a more extensive renovation, caulking is an essential skill that every homeowner should master.

